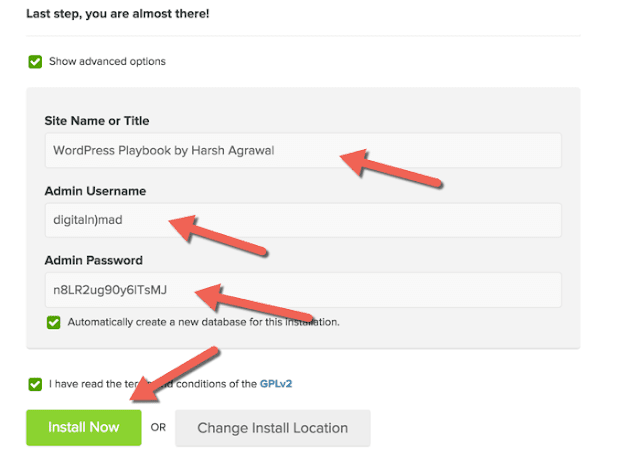
After registering a domain name and web host from bluehost.com, now it’s time to install WordPress on your Bluehost cPanel.
Here are a few steps are taken to install WordPress which are as follows :
| Step 1 : Login to your BlueHost CPanel |
|---|
| Go to BlueHost.com and click on “log in” at the top, in the login field type your domain name and password and click on “submit”. |
| Step 2 : Install wordpress on BlueHost |
|---|
| Here is the BlueHost cPanel Dashboard, scroll down to “website” and select “Install WordPress” from the list. |
| Step 3 : Select domain name to install wordpress |
|---|
| Now a page will appear, where you have to select the domain name for which you want to install WordPress.
Here you can decide if you want your domain name with www or without www, I recommend to use a domain name without www.
Check the domain in the available domain name and click on next and then click on show advanced option. |
Now you are done !! Now login to WordPress and start creating your blog.


1 Comments
Thanks its very informative.
ReplyDeleteWe appreciate your comment! You can either ask a question or review our blog. Thanks!!