 |
| Beginner’s guide to buy a domain name and hosting plan |
BlueHost: Beginner’s guide to buy a domain name and hosting plan
In this post, I will provide you a step by step guide to buy a domain name and hosting plan, as this is a beginner’s guide I am providing all steps in detail.| Step 1: Go to Bluehost.com |
|---|
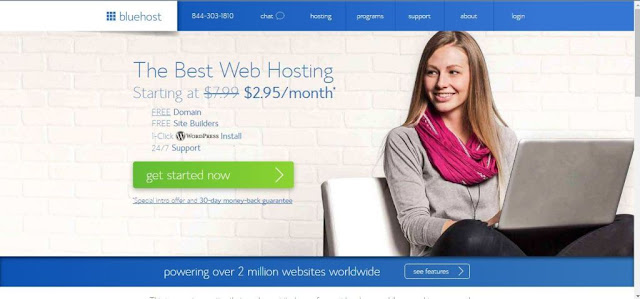
| Type Bluehost.com in any browser and land to BlueHost homepage, click on get started now |
| Step 2: Select your hosting plan |
|---|
| You will land to a page where there are three hosting plans, click on select to choose one of the three plans. I recommend you to start with the basic plan as a beginner and it is also cheaper than the other two plans mentioned. NOTE: Each hosting plans comes with a free domain name and thus you don’t need to pay for your domain name |
| Step 3: Choose a new ( free ) domain |
|---|
| Now, you will land to a page asking you for a new domain name or an existing domain name, just choose a new domain name to keep process simple. |
| Step 4: Enter your account Details |
|---|
| Now, you will land on a page where you have to fill required details, First comes is the account details, just fill all required information and scroll down. |
| Step 5: Check package information |
|---|
| Check your package information, uncheck the options “Domain Privacy Protection”, “Site Backup Pro” and “Sitelock Security” as you don’t need them in the beginning and also it will increase your expense. |
| Step 6: Complete your payment |
|---|
| By default, you will see the option to make payment via credit card only. If you want to make payment via PayPal, click on “more payment options” and it will reveal the pay by PayPal option as well.
Fill the required details, check to agree to terms and conditions and then click on submit.
|
| Step 7: Create your password |
|---|
| After making the payment, you will land to a sales page, ignore this and click on complete.
On the next page, you will see a confirmation message and click on create your password.
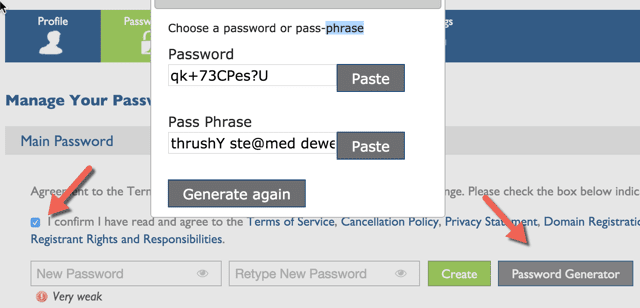
I recommend you to use a password generator to create a complex password, copy and paste the password in a safe place and click on paste and then click on create.
|
| Step 8: Login to your BlueHost CPanel |
|---|
| Check your email inbox, and you will find a confirmation email with all of the login information for your web hosting account.
Go to BlueHost.com and click on “login” at the top, in the login field type your domain name and password and click on “submit”
|
You are Done !! now it’s time to know “How to install WordPress on Bluehost”


34 Comments
Some truly nice stuff on this site, I like it.
ReplyDeleteI was wondering if you ever thought of changing
ReplyDeletethe page layout of your website? Its very well written; I love what youve got to say.
But maybe you could a little more in the way of content
so people could connect with it better. Youve got an awful lot of text for only having
1 or 2 pictures. Maybe you could space it out better?
I think what you said made a bunch of sense. However, what
ReplyDeleteabout this? suppose you were to write a awesome title?
I mean, I don't want to tell you how to run your blog, but suppose you
added something to possibly grab folk's attention? I mean "BlueHost : Beginner�s guide to buy a domain name and hosting plan" is a little boring.
You could peek at Yahoo's home page and watch how they
write article headlines to get people to click. You might add a video
or a pic or two to get people interested about what you've got to say.
In my opinion, it could make your website a little livelier.
But wanna remark that you have a very decent website, I the pattern it actually stands out.
ReplyDeletePlease let me know if you're looking for a article writer for your blog.
ReplyDeleteYou have some really good articles and I believe I would be a good asset.
If you ever want to take some of the load off,
I'd absolutely love to write some material for your
blog in exchange for a link back to mine. Please shoot me an e-mail if interested.
Thanks!
hello!,I really like your writing so much! percentage we be in contact extra about your
ReplyDeletepost on AOL? I require an expert in this area to unravel my problem.
Maybe that's you! Looking ahead to see you.
Wonderful post.Never knew this, appreciate it for
ReplyDeleteletting me know.
Hello would you mind stating which blog platform you're using?
ReplyDeleteI'm planning to start my own blog soon but I'm having a hard time deciding between BlogEngine/Wordpress/B2evolution and Drupal.
The reason I ask is because your layout seems different then most
blogs and I'm looking for something completely unique.
P.S My apologies for getting off-topic but I had to ask!
This is the perfect website for anyone who wants to find out about this topic.
ReplyDeleteYou understand a whole lot its almost hard to argue with you (not that I
personally would want to?HaHa). You definitely put a
fresh spin on a subject that has been discussed for ages.
Wonderful stuff, just excellent!
I'd constantly want to be update on new articles on this internet site, saved to
ReplyDeletebookmarks!
Its great as your other content :D, thank you for posting.
ReplyDeleteWrite more, thats all I have to say. Literally, it seems as though
ReplyDeleteyou relied on the video to make your point. You obviously know what youre talking about, why waste your
intelligence on just posting videos to your blog when you could be giving us something
informative to read?
It's not my first time to pay a quick visit this web site, i am browsing
ReplyDeletethis web site dailly and take good facts from here daily.
Great post, you have pointed out some wonderful details, I too believe this is a very wonderful website.
ReplyDeleteGreat site. Lots of helpful info here. I
ReplyDeleteam sending it to a few friends ans additionally sharing in delicious.
And of course, thank you on your effort!
Howdy would you mind sharing which blog platform you're using?
ReplyDeleteI'm going to start my own blog in the near future but I'm having a difficult time
choosing between BlogEngine/Wordpress/B2evolution and Drupal.
The reason I ask is because your design seems different then most blogs and I'm looking for something unique.
P.S Apologies for getting off-topic but I had to ask!
For latest news you have to go to see world-wide-web and on internet
ReplyDeleteI found this site as a most excellent web page
for most recent updates.
I do agree with all of the concepts you've introduced on your post.
ReplyDeleteThey're very convincing and can certainly work. Nonetheless, the posts are very short for starters.
May you please prolong them a little from next time?
Thanks for the post.
Hello. excellent job. I did not anticipate this.
ReplyDeleteThis is a fantastic story. Thanks!
I was suggested this blog by my cousin. I am not
ReplyDeletepositive whether or not this submit is written via him as nobody else realize such
special approximately my trouble. You're incredible!
Thank you!
Hi my family member! I wish to say that this post is awesome, nice written and come with approximately all important infos.
ReplyDeleteI'd like to look more posts like this .
Greetings! Very helpful advice in this particular post!
ReplyDeleteIt is the little changes that make the largest changes. Thanks a lot for sharing!
hi!,I love your writing very much! share we keep in touch extra about your article on AOL?
ReplyDeleteI need an expert on this house to solve my problem. Maybe that is you!
Looking ahead to look you.
Regards for helping out, wonderful information.
ReplyDeleteFor most recent news you have to pay a quick visit the web and on world-wide-web I found this
ReplyDeletewebsite as a finest website for most up-to-date updates.
fantastic points altogether, you just won a new reader.
ReplyDeleteWhat would you recommend in regards to your put up that you simply
made a few days ago? Any positive?
Hi there, just became aware of your blog through Google,
ReplyDeleteand found that it is truly informative. I am gonna watch out for brussels.
I will be grateful if you continue this in future.
Lots of people will be benefited from your writing.
Cheers!
I needed to write you that very small remark so as to give many thanks over again for
ReplyDeleteall the superb secrets you've contributed on this site.
It has been simply remarkably generous with you to give easily all most
people could have advertised for an e book to
earn some bucks on their own, notably since you could possibly have done
it if you ever decided. Those principles as well worked to
become easy way to recognize that some people have a similar passion just like mine to figure out a whole
lot more in terms of this problem. I am certain there are numerous more enjoyable periods in the future for people who
look into your blog.
Thanks so much with regard to giving us an update on this theme on your web
ReplyDeletesite. Please understand that if a fresh post becomes available or if perhaps any changes occur with the current article, I would be thinking about reading a
lot more and knowing how to make good use of those tactics you share.
Thanks for your time and consideration of other
men and women by making this site available.
Howdy! I could have sworn I've been to this website before but after going through
ReplyDeletemany of the posts I realized it's new to me. Nonetheless, I'm certainly pleased I came across it and I'll be book-marking it and checking back often!
We have sell some products of different custom boxes.it is very useful and very low price please visits this site thanks and please share this post with your friends. free domain names
ReplyDeleteIt's in fact very complex in this busy life to listen news on Television, therefore I only use the web for that reason, and
ReplyDeleteget the latest information.
Hey would you mind sharing which blog platform you're using?
ReplyDeleteI'm planning to start my own blog soon but I'm having a difficult time selecting between BlogEngine/Wordpress/B2evolution and Drupal.
The reason I ask is because your design and style seems different then most blogs and
I'm looking for something unique. P.S Apologies for getting off-topic but I had to ask!
On the site of the media network provider, you can grab this system listings of the most favourite channel.
ReplyDeleteWe possess a large number of vintage art nouveau, and art deco
posters. The Wedding Photography Las Vegas therefore happens to be
most high pressure photography since the photographer offers this extra duty and responsibility to bring your loved ones and their loving
activities through the photography other than highlighting the bride to be along with the bridegroom.
We appreciate your comment! You can either ask a question or review our blog. Thanks!!